Easy Homemade Artisan Sourdough Bread – Crispy Crust & Soft Inside
Recipe
Easy Homemade Artisan Sourdough Bread – Crispy Crust, Soft & Chewy Center
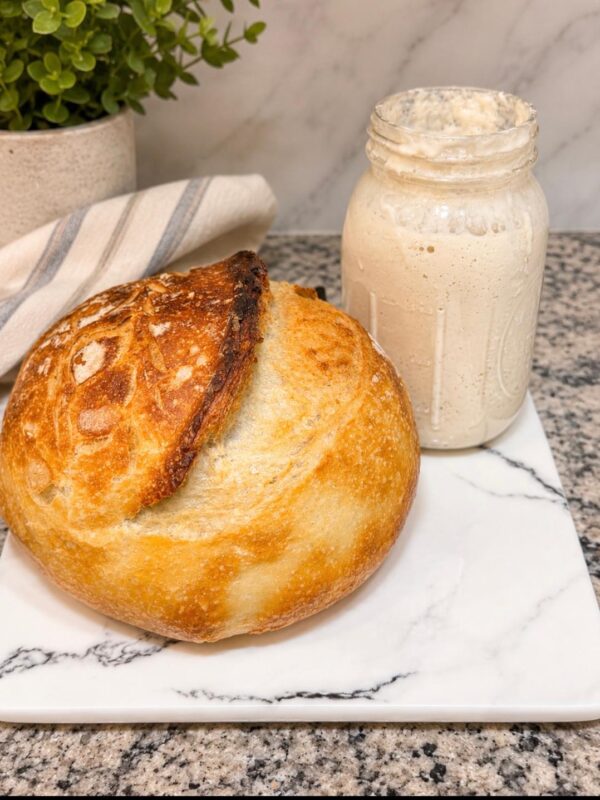
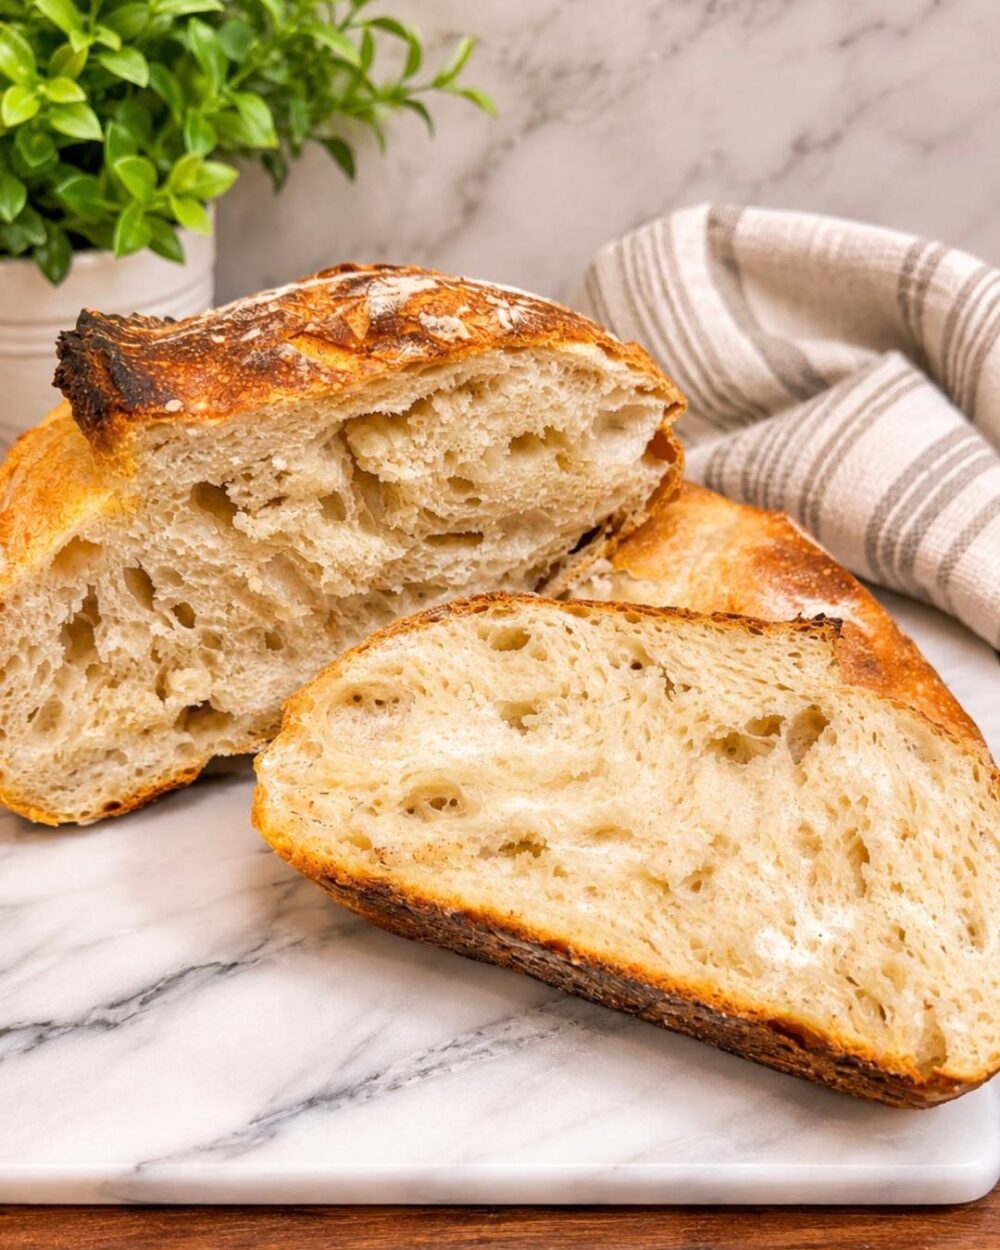
There’s nothing better than freshly baked homemade sourdough bread! This easy artisan sourdough recipe gives you a beautiful golden, crispy crust with a soft, chewy center. Made with just four simple ingredients, it’s perfect for anyone wanting to learn how to make homemade sourdough bread from scratch.
Scale
Ingredients
- Ingredients
- 3¼ cups bread flour all-purpose flour works too
- 2 teaspoons salt
- ½ cup active sourdough starter
- 1¼ cups warm water approximately (adjust as needed)
- Instructions
Instructions
- Instructions
- Step 1: Mix the Dough
- In a large mixing bowl, combine the warm water and active sourdough starter. Stir until the starter is mostly dissolved.
- Add the flour and salt. Mix everything together using a spoon until a shaggy dough forms.
- Transfer the dough onto a clean countertop and gently knead for approximately 1 minute until everything comes together.
- Step 2: First Rest
- Place the dough back into your bowl and cover it.
- Allow it to rest for 1 hour, preferably in a warm area of your kitchen.
- This resting period allows the flour to absorb the water and helps the dough begin developing its structure.
- Step 3: Stretch and Fold
- After the first hour, it’s time to stretch and fold your dough.
- Gently grab one side of the dough, stretch it upward, and fold it toward the center.
- Turn your bowl and repeat this process approximately 4–5 times, working your way around the dough.
- Cover the bowl again and allow the dough to rest for 30 minutes.
- Repeat the stretching and folding process for a total of 3–5 rounds, allowing 30 minutes of resting between each round.
- I personally watch the texture of my dough. Once it becomes smooth, elastic, and holds its shape better, I know I’m making progress.
- Step 4: Bulk Fermentation and Refrigeration
- After your final stretch and fold, allow the dough to continue fermenting at room temperature until it looks noticeably puffier, has some bubbles, and shows signs of rising.
- Depending on the temperature of your kitchen and the activity of your starter, this may take several additional hours.
- Cover the dough and place it into the refrigerator for approximately 9–12 hours or overnight.
- I’ve even refrigerated mine for up to 24 hours, but I prefer not to leave it too long because the dough can eventually overproof.
- Step 5: Shape Your Dough
- When you’re ready to bake, remove your dough from the refrigerator.
- Gently transfer it onto a lightly floured countertop and shape it into a round dough ball, creating a little tension across the surface.
- If you have a bread-proofing basket, also called a banneton, generously dust it with flour to prevent sticking.
- Place your shaped dough into the basket with the smooth side facing down.
- Cover loosely with plastic wrap.
- Step 6: Final Rise
- Allow the dough to rest in a warm area for approximately 2–3 hours, or until it becomes noticeably puffy.
- I usually look for the dough to rise about an inch in the basket, but the exact amount can vary.
- The dough should feel airy and slightly spring back when gently pressed.
- If your dough has already completed its final proof during refrigeration, it may not need another long rise. Watch the dough rather than relying only on the clock.
- Step 7: Preheat Your Dutch Oven
- Preheat your oven to 450°F.
- Place your Dutch oven inside with the lid on and allow it to preheat for approximately 30 minutes.
- Make sure your Dutch oven and its lid are oven-safe at this temperature.
- Step 8: Score the Dough
- Carefully turn your dough out of the bread basket onto a piece of parchment paper or a heat-safe silicone bread sling.
- Using a sharp bread-scoring blade or knife, make a cut across the top of your dough.
- Scoring allows the bread to expand properly while baking and helps create that beautiful artisan look.
- Step 9: Bake Your Sourdough Bread
- Carefully transfer your dough into the hot Dutch oven.
- For additional steam, you can add a few ice cubes beside the dough if your Dutch oven manufacturer permits it. This is completely optional because a covered Dutch oven already traps moisture.
- Cover the Dutch oven with its lid and bake at 450°F for 30 minutes.
- Carefully remove the lid and continue baking for another 15–20 minutes, or until the crust becomes beautifully golden brown.
- Step 10: Cool and Enjoy!
- Remove the bread from the Dutch oven and place it on a cooling rack.
- Now, if you’re anything like me, you’ll want to cut into that bread immediately!
- I absolutely love warm homemade bread, especially when the crust is crispy.
- But here’s my advice: allow your bread to cool for at least 1 hour before slicing.
- This gives the inside time to set properly and prevents that overly gummy or chewy texture.
- Slice, serve, and enjoy your homemade artisan sourdough bread!
Connie’s notes
Connie’s Tips for the Perfect Artisan Sourdough Bread
1. Make sure your starter is active.
Your sourdough starter should be bubbly and consistently doubling in size after feeding before you use it for bread. A newly created starter may take 10–14 days or longer to become established and strong enough for baking.
2. Bread flour is my favorite.
I prefer bread flour because its higher protein content helps create a stronger dough and that beautiful chewy texture. However, all-purpose flour works too!
3. Warm temperatures make a difference.
Sourdough loves a comfortably warm environment. If your kitchen is cold, your dough may take longer to rise. Avoid excessively hot areas that could damage the starter.
4. Don’t skip the stretching and folding.
This is one of my favorite parts of making sourdough. Stretching and folding strengthens the dough without requiring long periods of kneading.
5. Don’t add too much flour.
Your dough may feel slightly sticky in the beginning, and that’s normal. Adding too much extra flour can make your bread dense and dry.
6. Watch your dough, not just the clock.
Every sourdough starter behaves differently. Some doughs rise quickly, while others take longer. Look for visible fermentation, a puffier texture, and bubbles rather than relying only on exact timing.
7. Refrigerating overnight helps develop flavor.
Allowing your dough to rest in the refrigerator can help develop that delicious sourdough flavor. Just remember that fermentation continues slowly even in the refrigerator.
8. A bread basket makes shaping easier.
If you plan on making sourdough regularly, I recommend investing in a basic sourdough bread-making kit. Some include a proofing basket, scoring blade, and other helpful accessories. You can also use a bowl lined with a well-floured kitchen towel.
9. Preheat your Dutch oven.
A properly preheated Dutch oven helps the bread rise beautifully and creates that crispy, golden crust.
10. Be patient before slicing.
I know how tempting it is to cut into freshly baked bread, but allowing it to cool for at least an hour makes a big difference in the texture.
Frequently Asked Questions
Can I use all-purpose flour instead of bread flour?
Absolutely! I personally prefer bread flour, but all-purpose flour can also make delicious sourdough bread. You may need to adjust the water slightly depending on the flour.
How do I know if my sourdough starter is ready?
Your starter should consistently rise after feeding, ideally doubling within approximately 4–8 hours under warm conditions. It should have bubbles and a pleasantly tangy aroma.
Can I leave my dough in the refrigerator for 24 hours?
Yes! I’ve done this myself. However, how long the dough can rest depends on how much it fermented before refrigeration and how cold your refrigerator is.
Why is my sourdough bread gummy inside?
This can happen if your bread is underbaked, underfermented, or sliced while it’s still too hot. Allowing it to cool before cutting can help.
Do I need a Dutch oven?
A Dutch oven is one of my favorite tools for sourdough because it traps steam and helps create a crispy crust. However, you can also bake sourdough using other oven-safe baking setups that provide appropriate steam.
Final Thoughts
Making homemade artisan sourdough bread is one of those things that gets easier every time you do it.
I always tell everyone that patience is the most important ingredient when it comes to sourdough.
Don’t worry about making the perfect loaf on your first try. Enjoy the process, learn how your dough behaves, and remember that every loaf teaches you something new.
And if you haven’t made your sourdough starter yet, make sure to check out my step-by-step sourdough starter series here on ConnieSweets.com.
Happy baking!
Did you make it?
Ratings help other people decide whether to try it — and they tell me which recipes are worth doing more of. It takes ten seconds.
↓ Leave your rating