No-Bake Strawberry Cheesecake
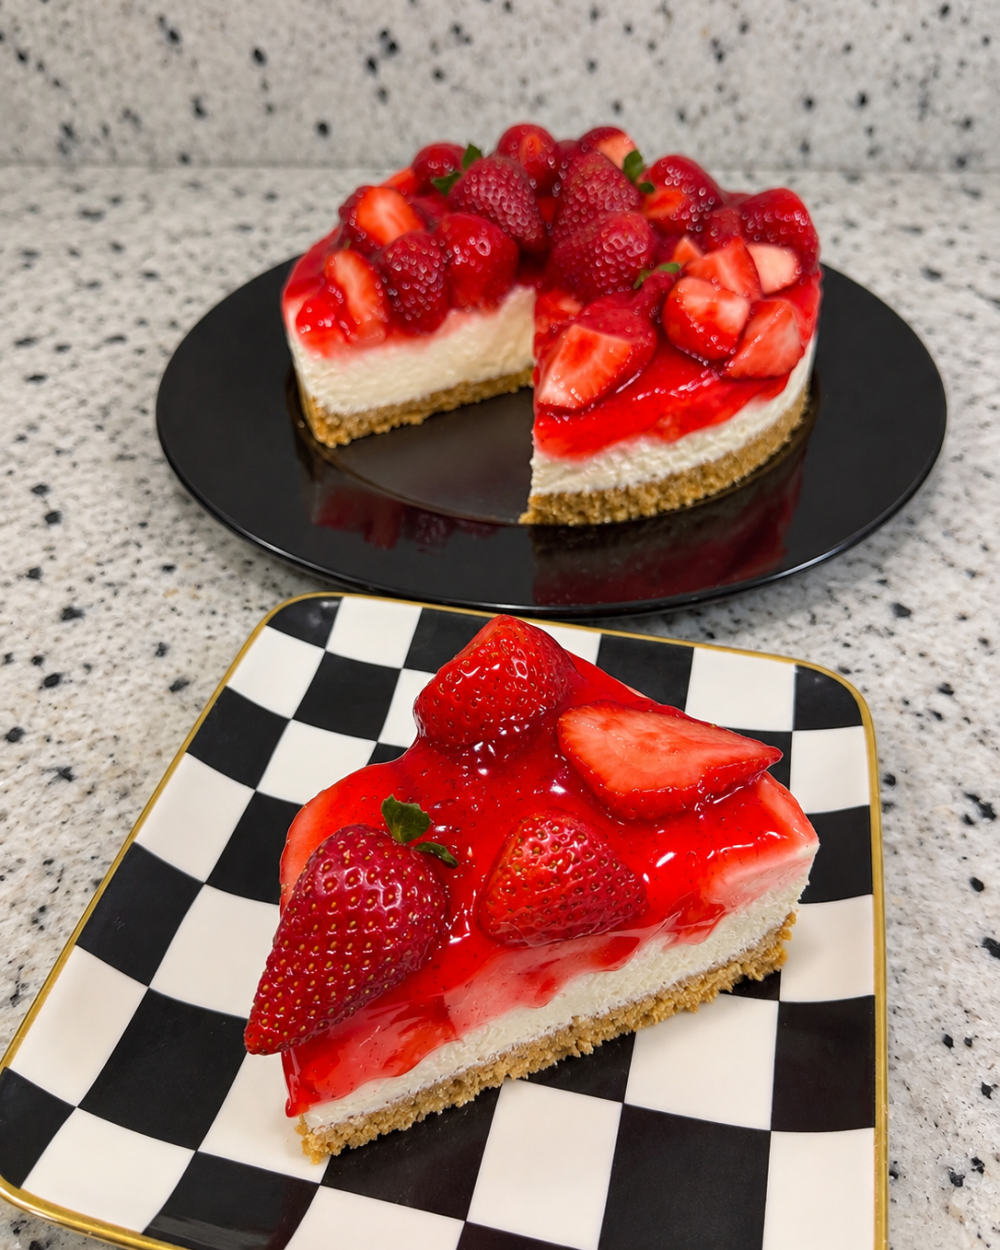
There’s something so inviting about a cheesecake topped with glossy, fresh strawberries. The buttery graham cracker crust, creamy vanilla filling, and sweet strawberry topping come together in a dessert that feels special without needing to turn on the oven. It’s a beautiful addition to a family gathering or holiday table, and preparing it the night before makes serving it even easier.
Recipe
No-Bake Strawberry Cheesecake
The buttery graham cracker crust, creamy vanilla filling, and sweet strawberry topping come together in a dessert that feels special without needing to turn on the oven. It’s a beautiful addition to a family gathering or holiday table, and preparing it the night before makes serving it even easier.
Scale
Ingredients
Crust
- 2 packages graham crackers
- 2/3 cup melted butter
Cheesecake Filling
- 16 ounces cream cheese (2 blocks), softened
- 1 cup powdered sugar
- 2 teaspoons vanilla extract
- 1 1/2 cups heavy whipping cream, cold
Strawberry Topping
- 1 pound fresh strawberries, hulled and chopped
- 1 package strawberry glaze
Instructions
- Prepare the crust.
- Crush the graham crackers in a food processor until fine. If you don’t have a food processor, place them in a zip-top bag and crush with a rolling pin or the bottom of a cup.
- Combine the crumbs and melted butter, mixing with a fork until evenly coated.
- Lightly spray a 9-inch pie dish or springform pan with nonstick spray. Press the crumb mixture firmly into the bottom using a flat-bottomed measuring cup. If using a pie dish, gently press the crumbs up the sides.
- Refrigerate while preparing the filling.
- Make the cheesecake filling.
- In a large bowl, whip the cold heavy cream, powdered sugar, and vanilla until thick and nearly at stiff peaks.
- In a separate bowl, beat the softened cream cheese until smooth. Add it to the whipped cream mixture and mix on low just until fully combined, smooth, and fluffy. Avoid overmixing.
- Fill and chill.
- Spread the cheesecake filling evenly over the chilled crust and smooth the top. Cover and refrigerate for at least 4–6 hours, preferably overnight, until firm.
- Prepare the strawberry topping.
- Wash the strawberries and pat them dry before hulling and chopping. Place them in a bowl, add the strawberry glaze, and gently stir until evenly coated.
- Top and serve.
- Once the cheesecake has set, carefully release it from the springform pan, if using. If using a pie dish, leave it in the dish.
- Spoon the strawberry topping over the cheesecake just before serving.
Connie’s notes
- Check your cracker package size. Graham cracker packages vary by brand. Use the same size each time so the crust keeps a consistent balance of crumbs and butter.
- Use full-fat block cream cheese. It gives the filling a firmer texture than spreadable cream cheese from a tub.
- Soften the cream cheese completely. Beating it separately before adding it helps prevent lumps.
- Keep the heavy cream cold. Cold cream whips more easily and helps the filling hold its shape.
- Pack the crust firmly. Press it evenly into the pan so it holds together when sliced.
- Allow plenty of chilling time. An overnight chill gives this no-bake filling the best chance to set for neat slices.
- Dry the strawberries well. Extra water can thin the glaze and make the topping runny.
- Add the topping close to serving. This keeps the strawberries fresh and limits moisture soaking into the filling.
- Slice with a warm knife. Run the knife under hot water, wipe it dry, and clean it between cuts.
- Store covered in the refrigerator. Enjoy within 3–4 days. For the freshest topping, store it separately and add it when serving.
Did you make it?
Ratings help other people decide whether to try it — and they tell me which recipes are worth doing more of. It takes ten seconds.
↓ Leave your rating