Cheesecake Factory-Style Chocolate Bread
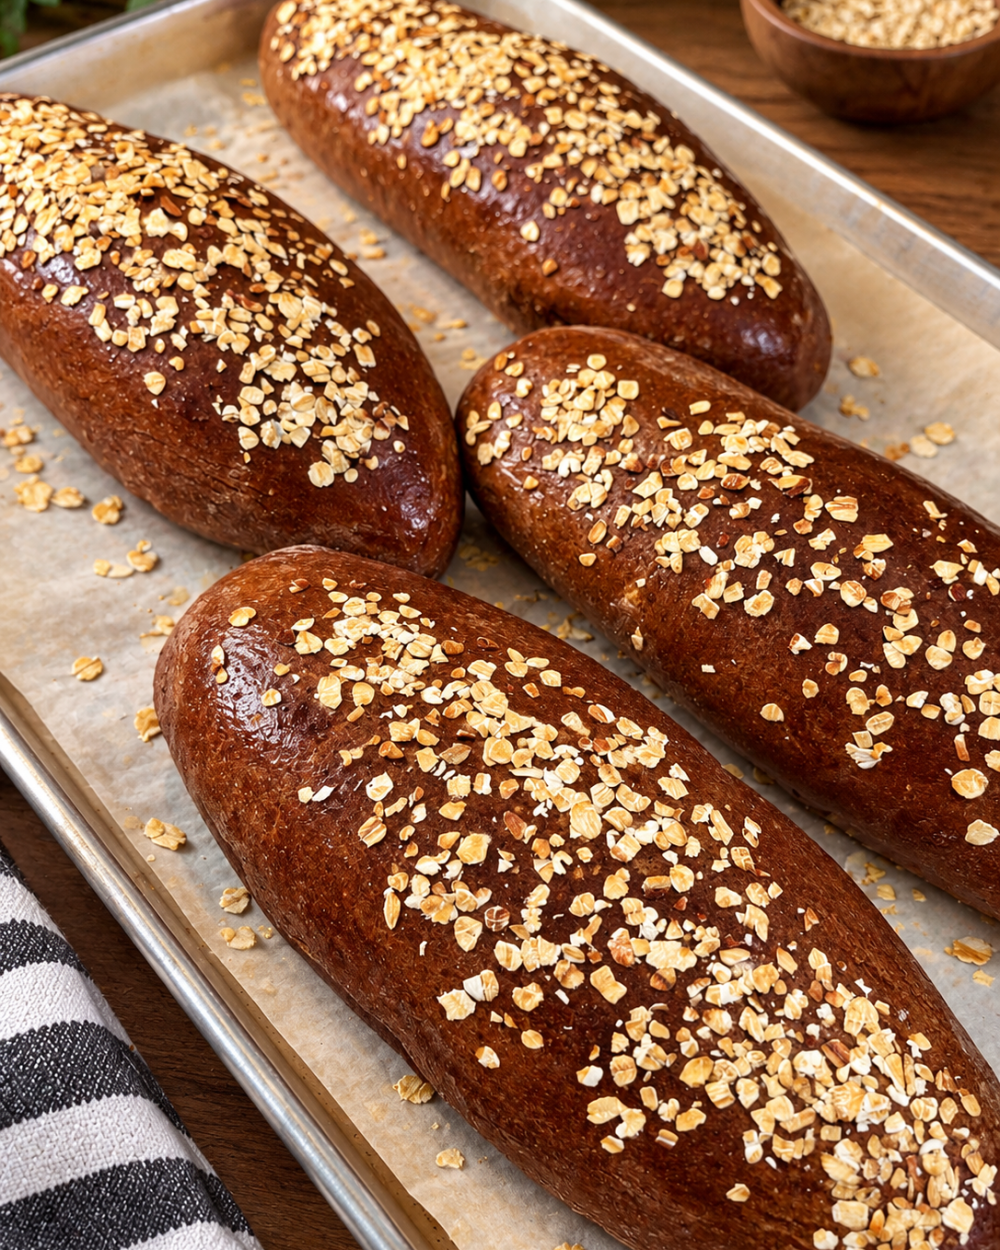
If you’ve ever eaten at The Cheesecake Factory, you probably know about their famous brown bread! It’s soft, slightly sweet, and has that delicious, rich flavor that makes you want to keep eating it. Now you can make your own version right at home!
The Story Behind This Recipe
One of my favorite things about going to The Cheesecake Factory isn’t just the food, it’s the warm brown bread they bring to your table before your meal even begins! There’s something about that soft texture, slightly sweet flavor, and oats sprinkled on top that makes it so irresistible.
I wanted to recreate that same delicious bread at home using simple ingredients. The combination of honey, molasses, cocoa powder, and whole wheat flour gives this bread its beautiful dark color and signature flavor.
And don’t let the name fool you! Even though it’s called chocolate bread, it doesn’t taste like chocolate cake. The cocoa powder adds color and a subtle richness, while the honey and molasses give it just the right amount of sweetness.
The best part? You can make four beautiful loaves, enjoy them warm with butter, and freeze the extras for another day. It’s the perfect bread to serve with dinner, soups, or even enjoy on its own!
Cheesecake Factory-Style Chocolate Bread
Ingredients
- 1 1/3 cups warm water
- 1 tablespoon brown sugar
- 1 tablespoon yeast
- 2 tablespoons molasses
- 1/4 cup honey
- 1 tablespoon butter, softened
- 1 1/2 cups whole wheat flour
- 2 cups all-purpose flour
- 2 tablespoons unsweetened cocoa powder
- 1/4 cup rolled oats, for topping
Instructions
- In a large mixing bowl, combine the warm water, brown sugar, and yeast. Stir and allow it to sit for about 10 minutes until the yeast becomes foamy.
- Add the molasses, honey, and softened butter. Mix until everything is well combined.
- Add the whole wheat flour, all-purpose flour, and cocoa powder. Using your hands or a stand mixer with a dough hook, knead for 7–8 minutes until the dough becomes smooth, soft, and elastic.
- Cover the bowl with a clean kitchen towel or plastic wrap and place it in a warm area for about 1 hour, or until the dough doubles in size.
- Transfer the dough onto a lightly floured surface and divide it into 4 equal pieces.
- Shape each piece into a log, cover, and allow them to rest for 10–15 minutes. This helps relax the dough and makes shaping easier.
- Roll each piece again into a longer, evenly shaped loaf. If the dough feels a little dry, lightly dampen your hands with water while shaping.
- Place the loaves onto a parchment-lined baking sheet, leaving space between each one. Lightly brush the tops with water and sprinkle rolled oats over them.
- Cover loosely and allow the loaves to rest for another 15 minutes while preheating your oven to 375°F (190°C).
- Bake for 25–30 minutes, or until the bread is fully baked and slightly firm on the outside.
- Remove from the oven and allow the bread to cool slightly before serving. Enjoy warm with butter, or let the loaves cool completely before storing or freezing.
Connie’s notes
- Make sure your water isn’t too hot. The water should be warm, around 105–110°F. Water that’s too hot can kill the yeast and prevent your bread from rising.
- Don’t skip the molasses. Molasses gives this bread its signature deep flavor and beautiful brown color. Combined with honey, it creates that slightly sweet taste.
- Cocoa powder doesn’t make it a dessert. The cocoa powder adds richness and color without making the bread taste overly chocolatey.
- Don’t add too much flour. Your dough should be soft and slightly tacky. Adding too much flour can make the bread dense instead of fluffy.
- Give the dough time to rise. A warm environment helps the yeast work properly. The first rise is especially important for a soft texture.
- Use water to help the oats stick. Lightly dampening the tops before sprinkling the oats helps them stay in place while baking.
- Don’t overbake. Since this bread is naturally dark, you can’t rely on its color to tell when it’s ready. The center should reach approximately 190–200°F.
- Freeze for later. Allow the bread to cool completely, wrap each loaf tightly, and place it in a freezer-safe bag. Freeze for up to 3 months. Thaw at room temperature and warm before serving.
- Serve with butter. For that restaurant-style experience, serve the bread slightly warm with softened butter.
- My favorite tip: Make a double batch. This bread freezes beautifully, and there’s nothing better than having homemade bread ready whenever you need it.
- Just warm it up, spread a little butter on top, and enjoy that Cheesecake Factory-inspired experience right in your own kitchen.
Ratings help other people decide whether to try it — and they tell me which recipes are worth doing more of. It takes ten seconds.
↓ Leave your rating